Plus How To Mount An Orchid Upside Down

Orchids are extremely beautiful and unique. I love how they look and the overall feel they give to a home. I had my first orchid when I was a teenager, my late grandma gave me one and I fell instantly in love. But like most people, I managed to kill it within a few weeks. As I got older, I still ran into the same issues every time an orchid came into my possession. I pretty much gave up on them since I felt I was a serial orchid killer.
When my grandmother passed away in 2017, an old childhood friend brought an orchid to my home as a sympathy gift. I was determined not to let it die since it reminded me of my grandmother. I did my due diligence and researched every piece of information I could find.

What I learned is that number one killer of the orchids was adding ice as the instructions stated. No wonder I killed every single orchid I owned! I was shocking the life out of its roots! Since then, I have kept my orchid alive with a couple close calls (sunburn and mealybugs!) and my orchid managed to produce a keiki (a baby orchid) which I was able to separate and now have two.
Basic Orchid Care
Orchids love to be moist, but need a well draining potting medium. A good and basic potting medium mix for orchids are: orchid bark ( which is redwood or fir bark), sand, perlite and sphagnum peat moss. Their roots should be planted shallow since they need constant airflow just like in the wild.
On average I water my orchids once a week, I do let them dry out in between waterings. They love humidity, but I find I do not need to mist often since the best place for them to thrive is in my bathroom near a south facing window ( an east facing window is perfect too). If you live in a dryer climate, or can not put an orchid in your bathroom; misting them daily will help with the humidity. They love bright indirect light, but be careful, direct sun can scorch the leaves turning them white. ( I learned the hard way!!!)

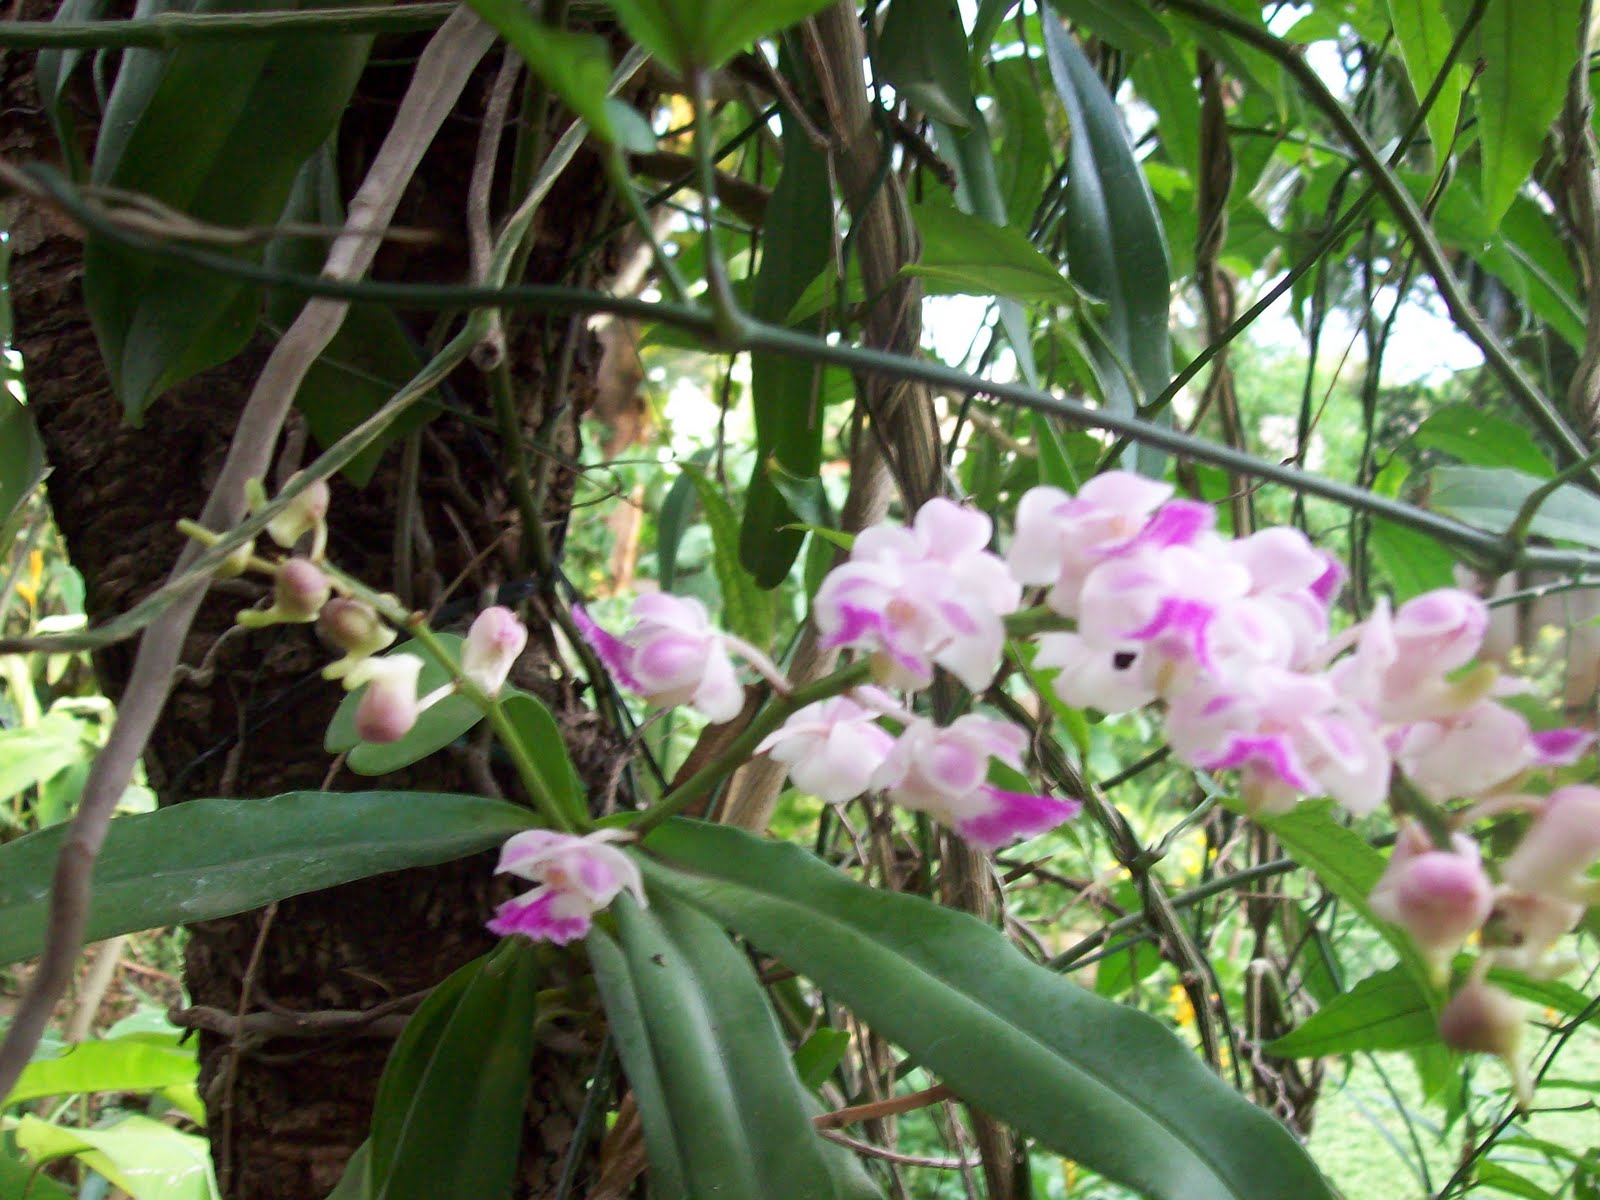
I own a few of your basic Phalaenopsis Orchids that you can find just about anywhere. It will bloom for me several times a year, and during that time, I do fertilize until it goes dormant. You can purchase an orchid leaf fertilizer or what I prefer; a mixture of water and a capful of fish emulsion or liquid algae fertilizer in a spray bottle and ‘leaf fertilize’ them once a week during growing season.
Some of the best ways to help your orchid thrive is to learn how they grow in nature. Naturally, they don’t grow in typical soil (unless they are terrestrial which means they grow from the ground). Since they are epiphytic, they will attach their roots to tree bark and climb. Many times, their blooms can weigh on its stem, causing the flowers to face downwards as compared to what we usually see in stores. They receive dappled sunlight through the trees and thrive in humid tropical forests (although some can be found in dessert-like conditions). It is stunning to see wild orchids in photos, and it is a great inspiration to help you display them in your home.
How To Mount Orchids Upside Down
Since learning that an orchid’s blooms have a tendency to face downwards, I decided mounting them onto cork bark and hanging them upside down would help mimic what one will find in nature. Remember: before you mount your orchid, make sure the species of orchid you own is epiphytic, this will not work on terrestrial orchids.
Supplies needed:


- Fishing line
- Scissors
- Cork Bark (Purchased from a pet supply store to guarantee that it is safe and sanitized)
- Sphagnum Moss (Purchased from a pet supply store to guarantee that it is safe and sanitized)
- Screw Hooks ,Wire or Sawtooth Hangers For hanging your mount (If using a wire, you will need a drill to create a hole in the Cork Bark to feed the wire through & wire cutters)
- Orchid
Before you begin to mount your orchid, make sure to clean the roots well to get rid of the potting medium it was in previously. Also, this is a great time to do some orchid maintenance by checking the roots cutting off anything that is dead. It would be ideal to also soak your sphagnum moss in water before hand to make it easier to handle.
Step 1: Screw in your screw hook; drill a hole in your cork bark so you may thread your wire through; or press in your sawtooth hanger. Once your hanging mount of choice is done, your ready for the next step.

Step 2: Wrap the fishing wire around the cork bark and tie off on the back leaving some slack (or a tail) of fishing wire to help tie off and secure when you are finished.
(I used twine to in this photo to show the tie off in the back with some ‘slack’.)
Step 3: On the front of the cork bark; lay a thin layer of wet sphagnum moss over the area where you will place the roots only. Secure moss with fishing line by wrapping the fishing line over the moss multiple times. Placing wet sphagnum moss near the leaves or where flowers may lay can cause rot.
Step 4: Lay down your cleaned and trimmed roots of your orchid on the secured sphagnum moss and begin placing more sphagnum moss around your roots until its adequately covered. To thin of a layer may cause the orchid to dry out quicker resulting in daily watering. To thick may result in pesky fungus gnats.
Step 5: Once you have a nice layer of sphagnum moss covering your roots, wrap the fishing line repeatedly around the sphagnum moss root ball you created until it is secure. Using the tail of fishing line you initially left on the back, tie off the fishing line to secure to finish off your mount.

Now that you are done, you can hang your mounted orchid in a preferably humid area that has bright indirect light & enjoy your beautiful living art piece you created.

Check out our entire Houseplant Addicts Network and join our growing community!
I’m starting an orchid collection and am obsessed already.
I also want to grow my knowledge of house plants and how to not kill them!
This is a wonderful site and info.
Thank you
ChristA